

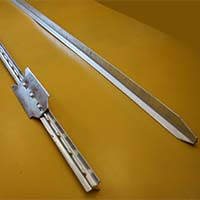
 Before you install a metal column Cossack, you need to mark the territory. If you need to put a grid fence evenly, stretch the tape between the points of the straight future fence, make marks on the tape where the posts will stand. If you are installing a chain- link mesh , the distance between the posts should be no more than 2m, and if the Cossack mesh is lightweight - from 4 to 8m. Having such a guideline, proceed to the installation of the pillars.
The shape of the Cossack pillars provides for installation by driving into the ground. This is useful when installing temporary fences, when installing a lightweight mesh on virgin soil, when installing trellises, and also when using poles as grounding rods.
However, in loose, plowed, heaving soil, it is not advisable to hammer the poles, this will lead to instability of the fence, and there is also a risk of looting.
This article discusses two methods for installing metal grid posts into the ground.
The procedure for concreting metal pillars Kazachka
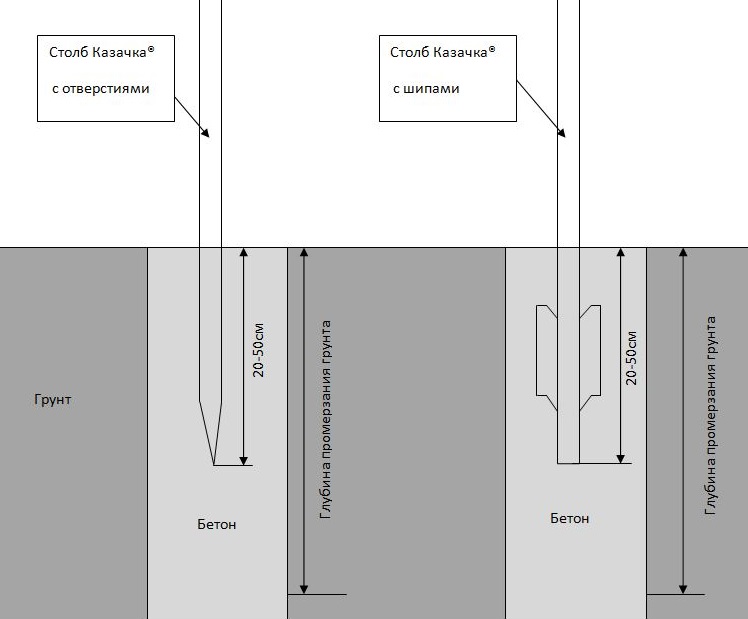 Metal poles are concreted to the depth of soil freezing.
This is done to prevent the pillars from being pushed out of the ground due to frost heaving. The fact is that in winter, the water in the ground freezes and expands, the volume of the soil increases and squeezes concrete with a pillar out of the ground.
For each region of Ukraine, the index of the depth of soil freezing is different and is calculated based on the average monthly temperature in the winter months of the year according to observations of the last 10 years.
Below is a map of soil freezing in the territory of the former CIS
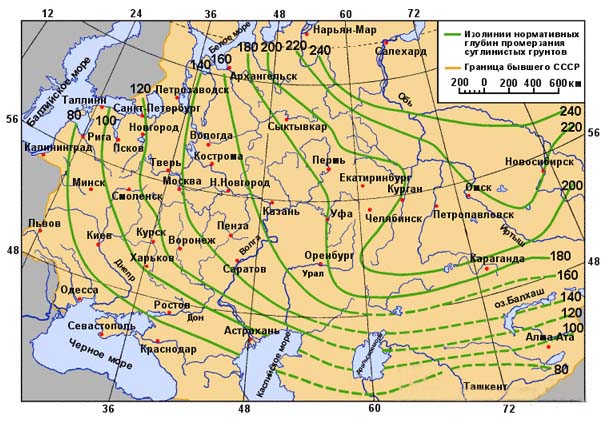
The resulting indicator must be multiplied by a factor of 1.1 and you will get the depth of concreting the column in meters.
The metal pillars of the Cossack are poured with concrete for 20-50 cm, and the depth of concreting depends on the calculated depth of soil freezing.
To install the post in the ground, dig a hole to the depth of freezing of the ground.
Make a mold for concrete from a plastic pipe, roofing material, wood or other available material. The point is that the walls of the concrete base be even, otherwise the soil will catch on the protrusions during heaving and pull the column up.
Pour the solution so that 20-50 cm remain to the surface. When the first layer of concrete has hardened, place the post inside and fill in the remaining space. To reduce the cost of installing pillars, large stones, broken bricks and other scrap are poured into the mold before pouring with mortar.
After the solution has completely solidified, proceed with the installation of the grid.
Installation of a grid post by driving into the ground
For hammering wooden and metal poles, a manual pole hammer tool is used.
Place the post on the marked spot so that the post runs smoothly, one person should hold the post. The second - puts this device on a pole and hammers it into the ground with rhythmic movements up and down. Now you can start attaching the grid to the poles.
The video shows exactly how this tool works.